Can you boot from a USB drive?
If you have been a Raspberry Pi enthusiast then you must have faced this dilemma, whether to keep using the SD card or to use a USB drive to boot the OS of your choice. There is a workaround for the older versions. But with Raspberry Pi 4 you can install the OS on your USB, plug it into your Pi and you are good to go!
For those of you that are not long term enthusiasts and have just got hold of a brand new Raspberry Pi 4, here is a short and sweet guide on setting up your Raspberry Pi and getting it up and running into the Pi-verse.
Things you will need
- Raspberry Pi
- USB drive (I am using a USB 3.1, 32 GB USB drive for booting)
- Raspberry Pi Power Supply
- Ethernet cable
- Your computer from where you will access your Pi
Preparing your Bootable USB drive
You can use various softwares out there for this step. But for me only the Raspberry Pi Imager worked. It is provided by the official Raspberry Pi website, so you can rest assured that it is specifically made for your needs.
For Windows, download it from this link. Run the downloaded .exe file and install the imager on your machine. If you are using Linux you can type sudo apt install rpi-imager into your terminal to install it.
Although this post talks about running the Ubuntu Server on your raspberry, you can install any OS of your choice as long as the hardware requirements of the OS are met by your Pi. Where there is a will, there is a way 😉.
You can follow the Pi Imager’s guidelines to install Ubuntu Server but it did not work for me somehow, so I will suggest that you download and install it from the source manually. If you have a 4 GB RAM on your Pi 4 then you can safely choose the 64-bit version or if you want to play it safe then go for the 32-bit version.
I am using the latest release of the Ubuntu Server, the LTS version straight up refused to boot on my Pi.
Now simply follow these steps:
- Plug in the USB into your PC.
- Open Pi Imager.
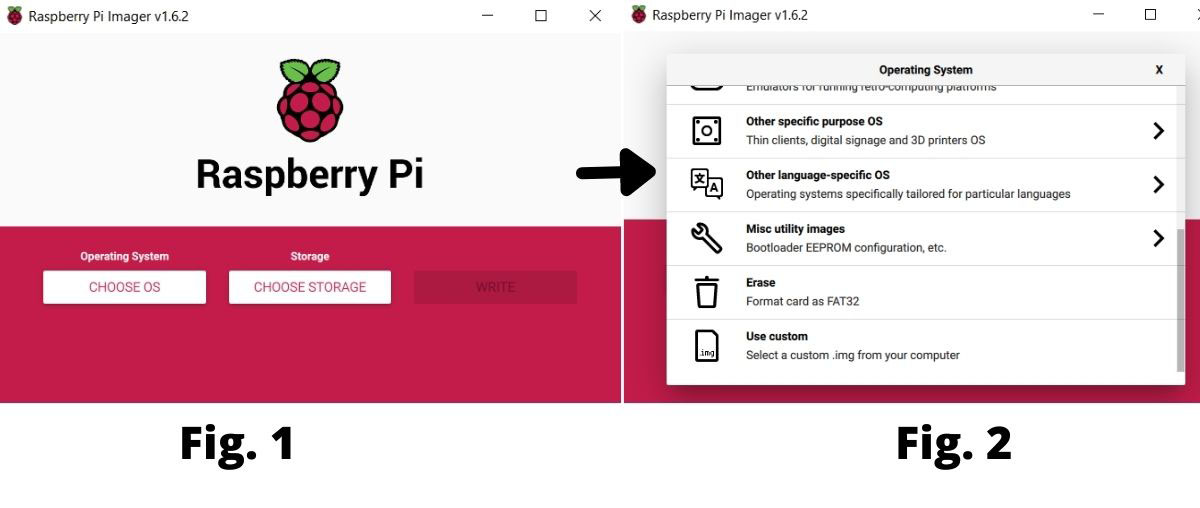
- Click the the OS option as shown in Fig. 1 below.
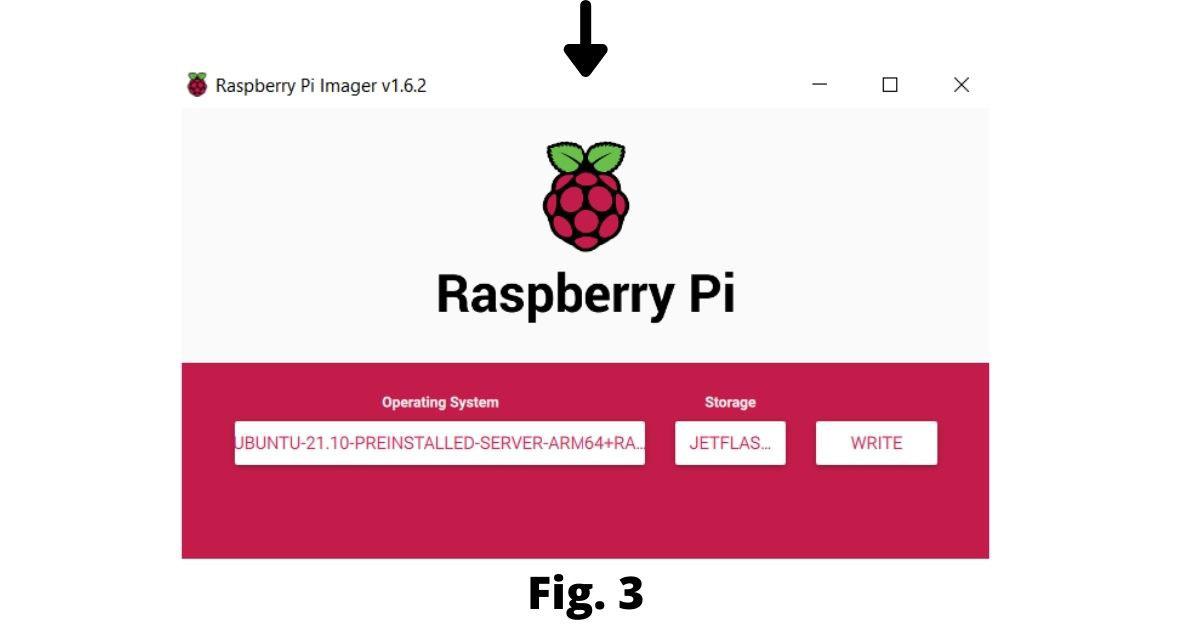
- Scroll down when the prompt appears as shown in Fig.2. Choose the “Use custom” option. You will be prompted to choose a file from your computer. Choose the downloaded Ubuntu
.XZfile that you downloaded earlier. - Click the Storage option as shown in Fig. 1 and choose the plugged in USB from the options available.
- Click “write” as shown in Fig. 3 and wait for the USB to be written over and verified. If there is an error during verification, try to be a bit patient and write the file again.
- Eject your USB when prompted.


Finding the IP address of your Pi
You will require the IP address of your Pi to access it via SSH. Again, you can use many ways to achieve that such as logging into your router and finding the list of devices, but I will illustrate the method through Nmap. To use it first you will need to install it.
- If you are on Windows, go to the download page of Nmap and download the binary package for your Windows version. If you are on a Linux distribution, run the command
sudo apt-get install nmapto install it. - Install it and choose the default settings. If you are a Super-User you can tweak it to your liking 👨💻.
- Find out the IP address of your machine first by typing
ipconfigfor Windows andifconfigfor Linux. If that command does not work on Linux then install net-tools first throughsudo apt install net-tools. - Your IP address is divided into 4 parts, for example something like
129.789.9.5. Now what you have to do is to remove the last part and instead of it insert0/24. Hence,129.789.9.5becomes129.789.9.0/24. - Plug in the bootable USB and the ethernet cable into your Pi and power it on. The red and green signals will light up and the green one will start blinking like a heartbeat 💓 if the boot was successful.
- Enter the Nmap command in the terminal :
nmap -sP <edited IP address>, for example:nmap -sP 129.789.9.0/24.
You will get a list of the devices connected to your wifi on your terminal. The Raspberry Pi’s IP address is probably under the name Raspberry Pi Trading. Copy it, you will require it in the next step.
SSH-ing into your Pi
Again you can use various softwares that allow you to SSH into a device remotely, but like Linux, you can now do it from Windows Terminal as well. If you have not yet heard of or used Windows Terminal, here is a good reason to set it up.
In the Windows Terminal simply type ssh ubuntu@<The IP address of the Pi> and you will receive a message something like:
The authenticity of host ‘Raspberry Pi’s IP address (IP)’ can’t be established.
Type yes.
The connection will be closed and you will have to SSH into the Pi again. The default password is ubuntu. You will be required to change it immediately and the connection will be closed again. After this step you can safely SSH into your Pi and now it is completely yours to fiddle with!
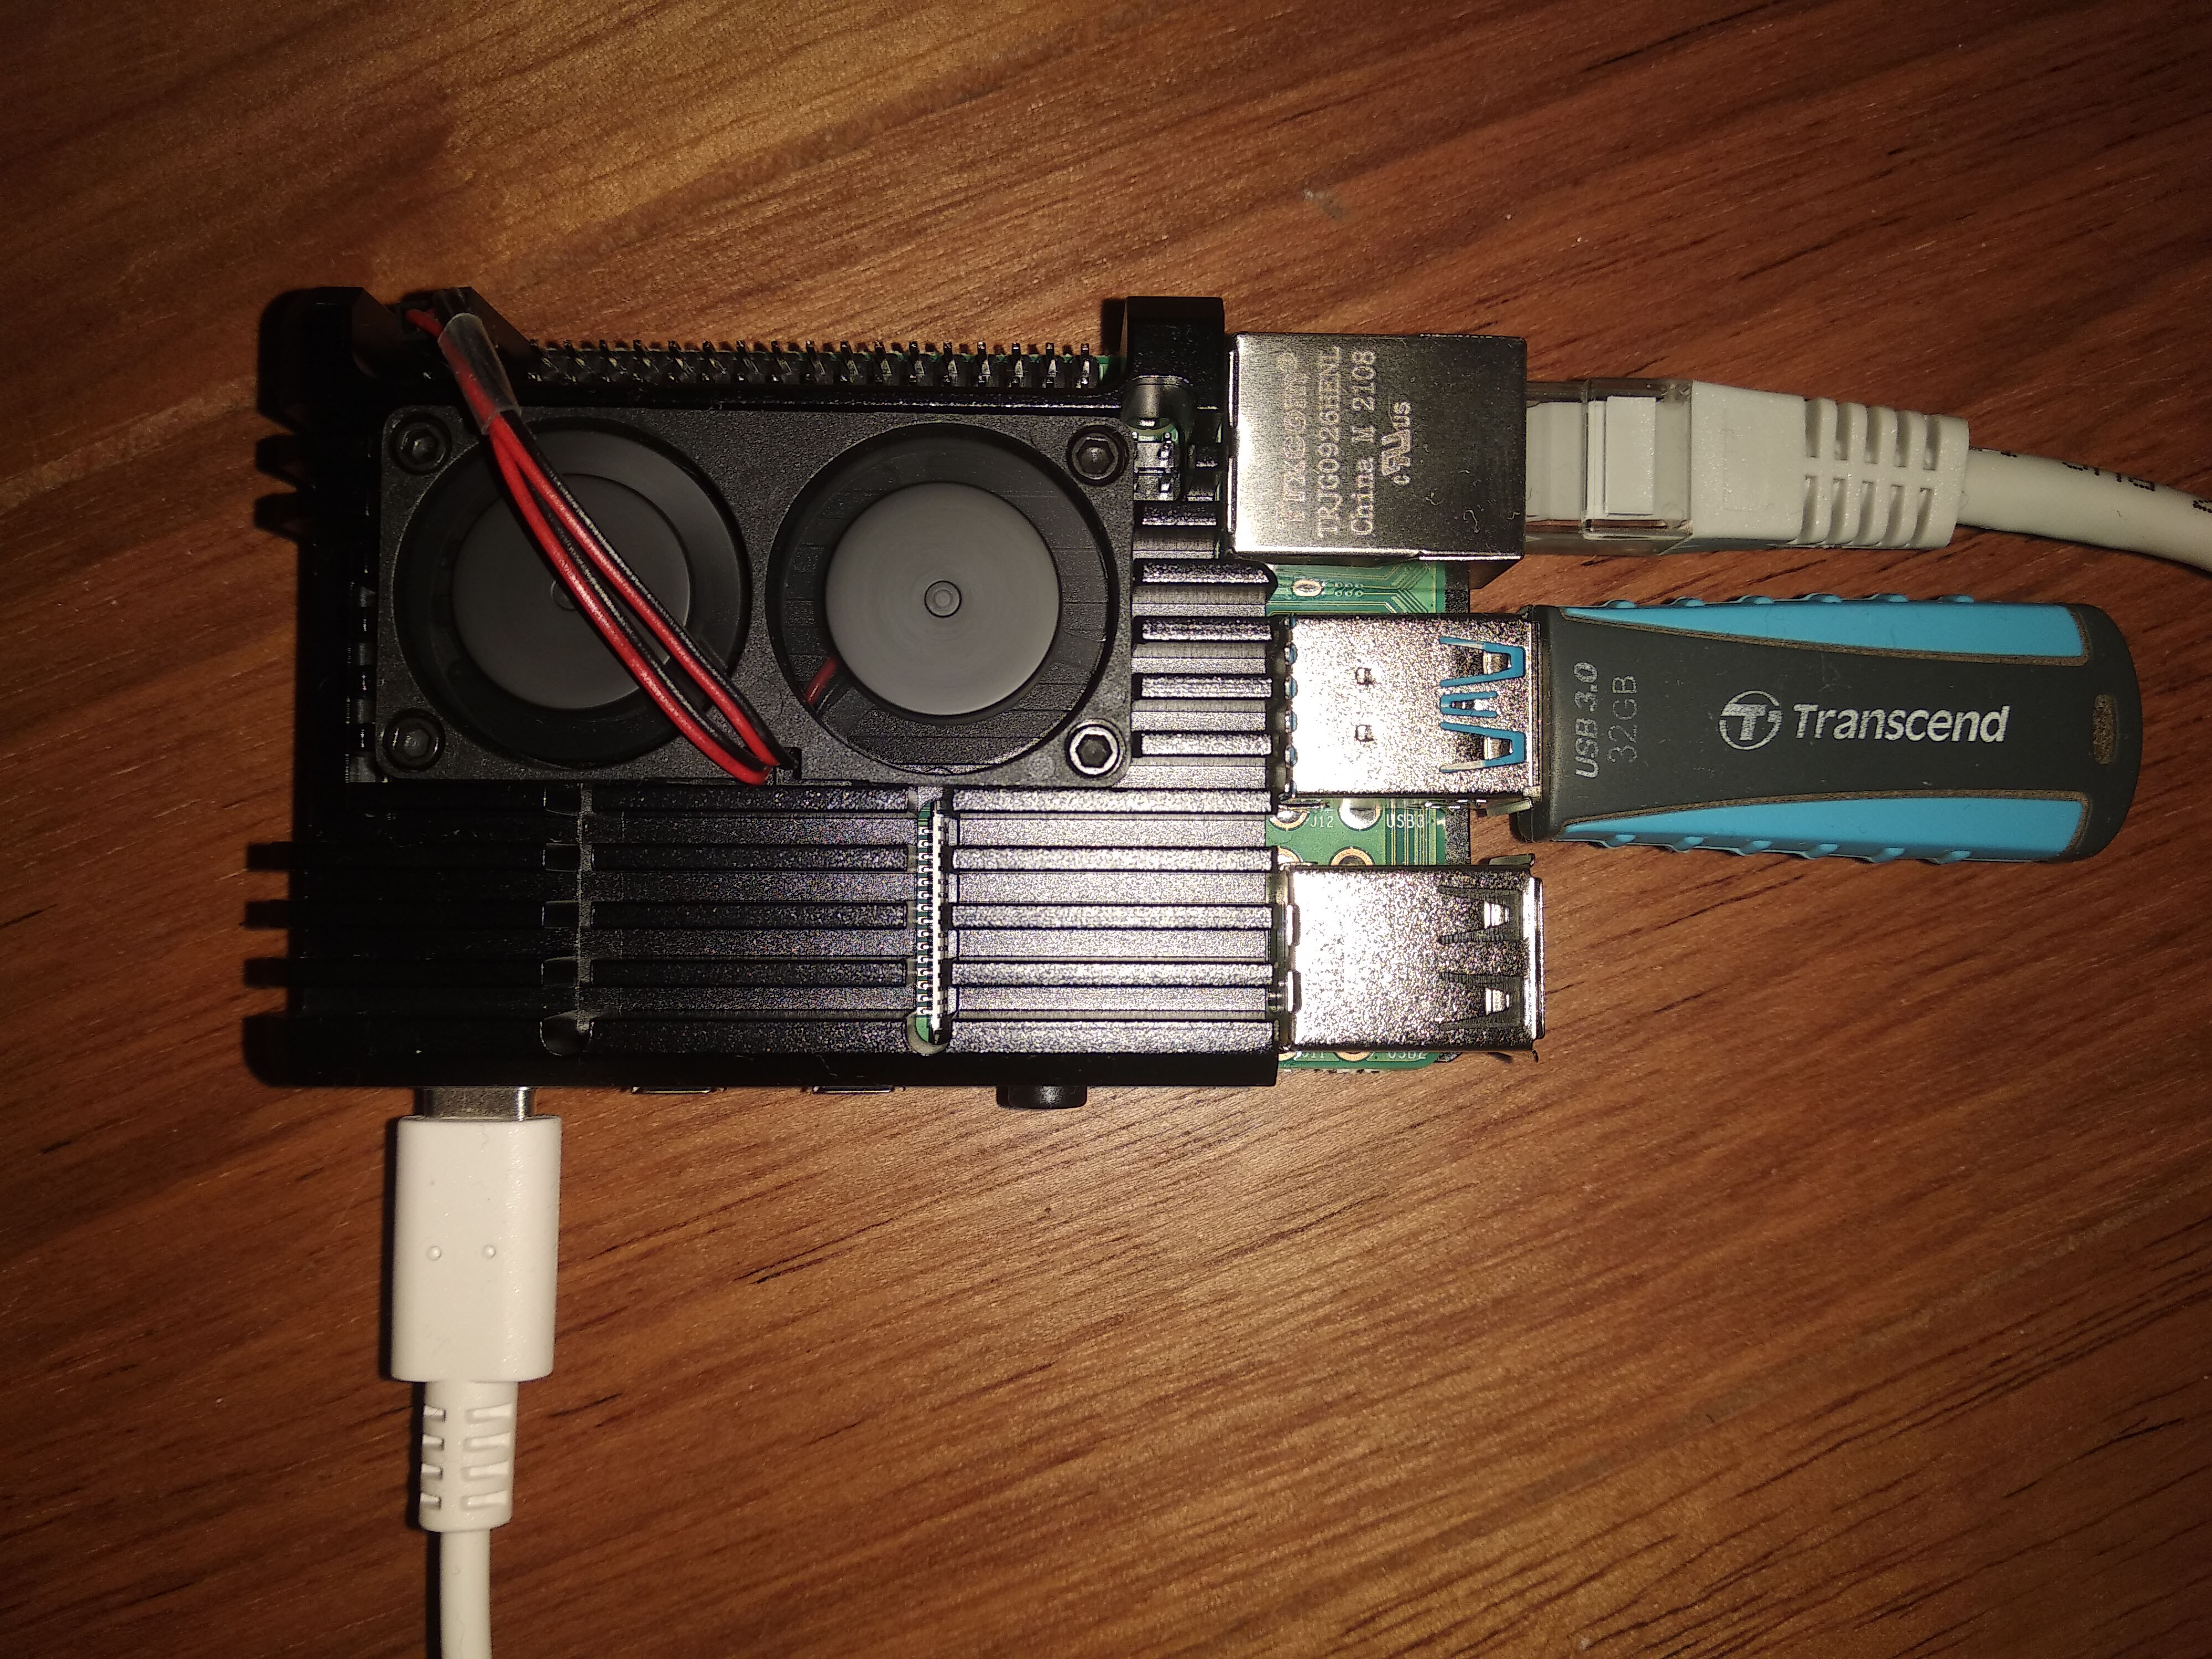
PS: Here is my Raspberry Pi 4. I am using an armour case which keeps the CPU temperature around 32°C-36°C. You can even keep it on a laptop cooler to achieve some cooling.

